Appearance
ASI Wallet
A secure, fully decentralized wallet for the ASI Chain network with an integrated Rholang IDE. The wallet runs entirely in your browser with direct blockchain connection and AES-256 encrypted local storage.
Access the wallet: wallet.dev.asichain.io
SECURITY NOTICE
This is a decentralized wallet with no backend. You control your keys and data. Keep your private key secure and never share it. There is no recovery mechanism for lost passwords or keys.
Getting Started
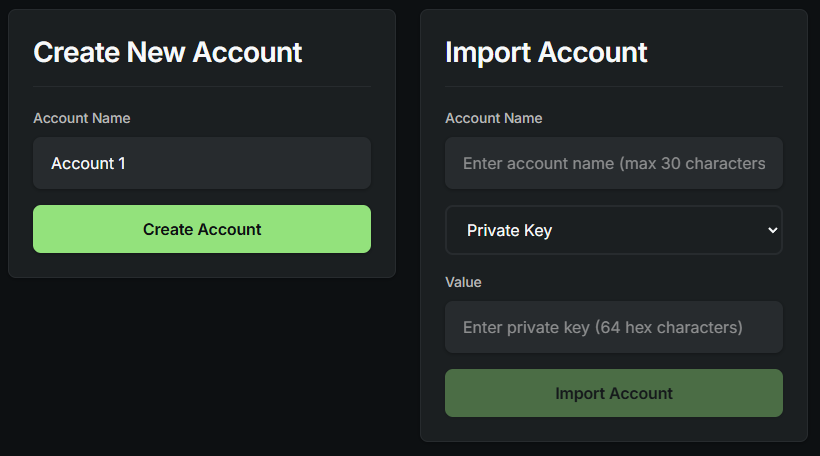
Step 1: Create or Import Your Account
Navigate to the Accounts page to create a new account or import an existing one.
Create New Account:
- Enter an account name (maximum 30 characters)
- Click "Create Account" button
- The wallet will generate a secure private key automatically
- Your account will appear with "UNLOCKED" status
Import Existing Account:
- Enter an account name (maximum 30 characters)
- Select import type:
- Private Key: Full account access
- Ethereum Address (Watch Only): Monitor-only mode
- ASI Address (Watch Only): Monitor-only mode
- Enter the corresponding value
- Click "Import Account"
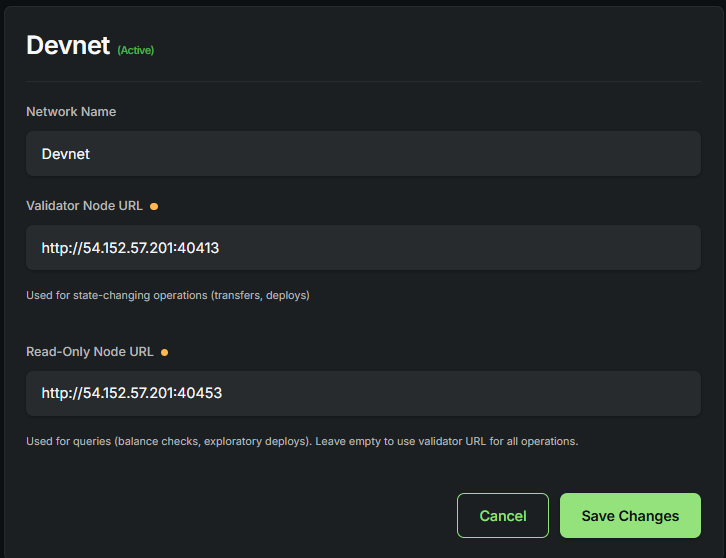
Step 2: Configure Network Connection
After creating your account, configure the network connection on the Settings page.
Devnet Configuration:
Validator Node (for transactions):
- Host:
54.152.57.201 - gRPC Port:
40401 - HTTP Port:
40413
Observer Node (read-only operations):
- Host:
54.152.57.201 - gRPC Port:
40451 - HTTP Port:
40453
The wallet automatically routes write operations (transfers, deployments) to the Validator node and read operations (balance checks, queries) to the Observer node.
Step 3: Request Test Tokens
Visit the ASI Chain Faucet and request tokens for your wallet address.
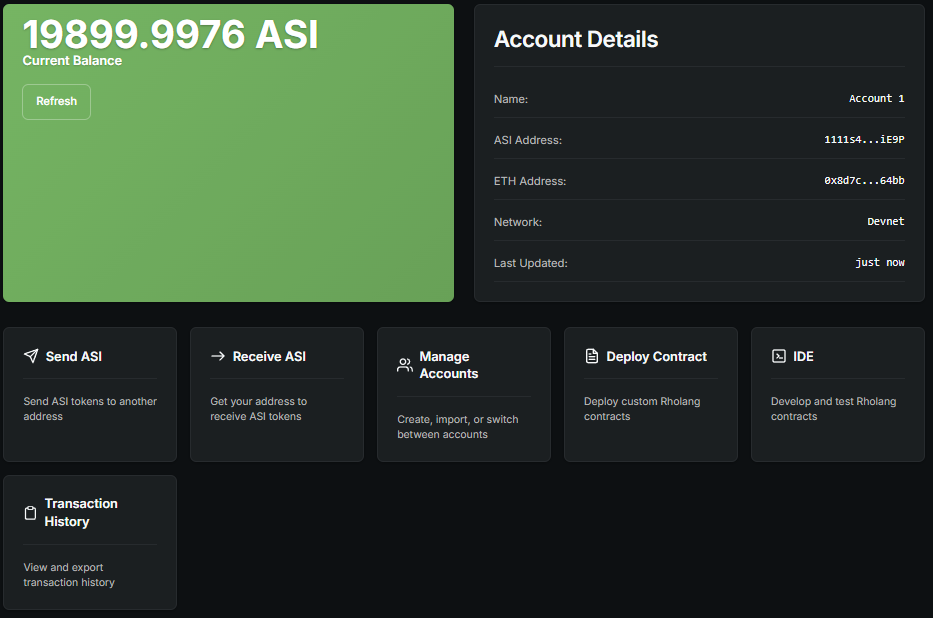
Dashboard
The Dashboard provides an overview of your account with balance information, quick actions, and network status.
Account Information:
- Current balance
- Account name
- ASI Address (click to copy)
- ETH Address (click to copy)
- Last update timestamp
Quick Actions:
- Send ASI
- Receive ASI
- Manage Accounts
- Deploy Contract
- IDE
- Transaction History
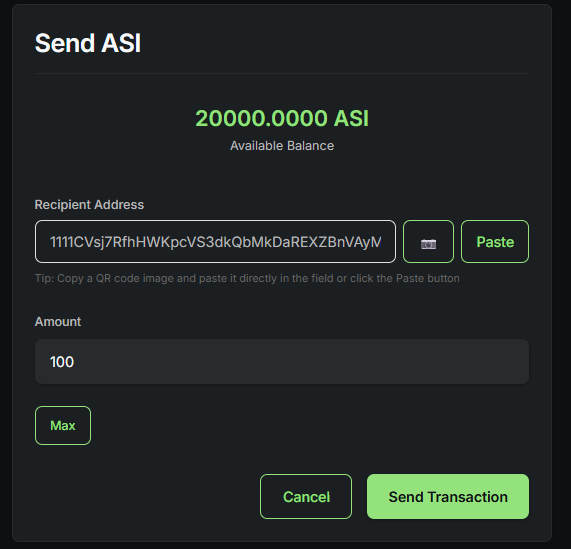
Send Tokens
The Send page allows you to transfer ASI tokens.
Sending Process:
- Enter Recipient Address: Type or paste the ASI address, scan a QR code with camera button, or paste a QR code image from clipboard
- Enter Amount: Type the amount or click "Max" to send maximum available balance
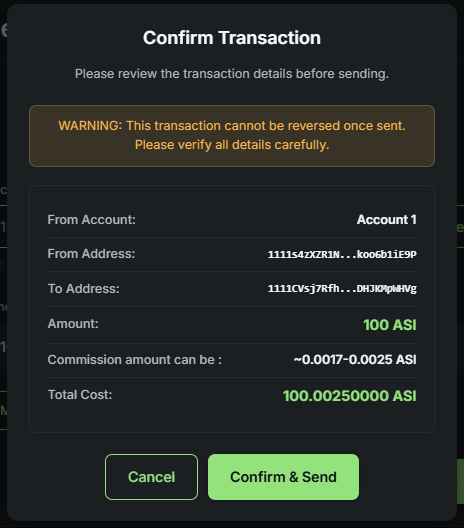
- Send Transaction: Click the button and confirm transaction details
Features:
- Real-time balance display
- QR code scanning for recipient address
- Maximum amount button
- Transaction confirmation dialog
After clicking "Send Transaction", a confirmation dialog appears with transaction details.
Receive Tokens
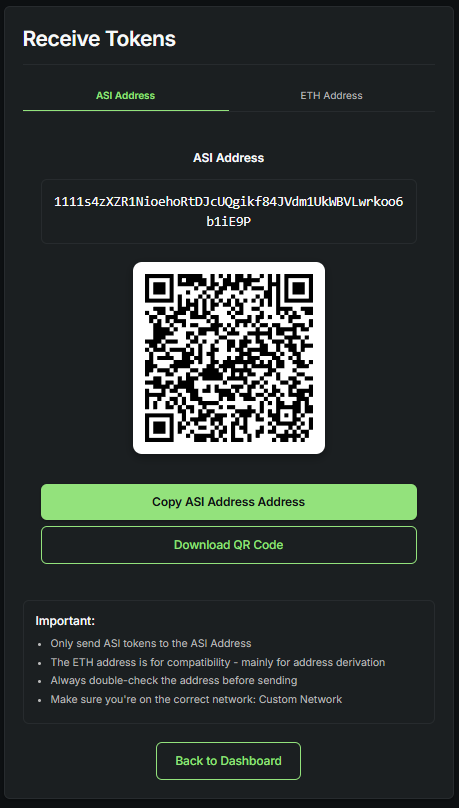
The Receive page displays your address for receiving tokens.
Address Display:
- Toggle between "ASI Address" and "ETH Address" tabs
- Full address text (click to copy)
- QR code for easy scanning
- "Copy Address" and "Download QR Code" buttons
TIP
Only send ASI tokens to the ASI Address. The ETH address is for compatibility purposes only.
Transaction History
The History page shows all your transactions with auto-refresh every 30 seconds.
Features:
- Auto-refresh and manual refresh
- Export to JSON or CSV
- Filter by type (All, Send, Deploy) and status (All, Pending, Confirmed, Failed)
- Transaction statistics (total, sent, deployments)
Transaction Details: Each transaction shows type, status, amount, recipient address, timestamp, and block information when confirmed.

Deploy Contracts
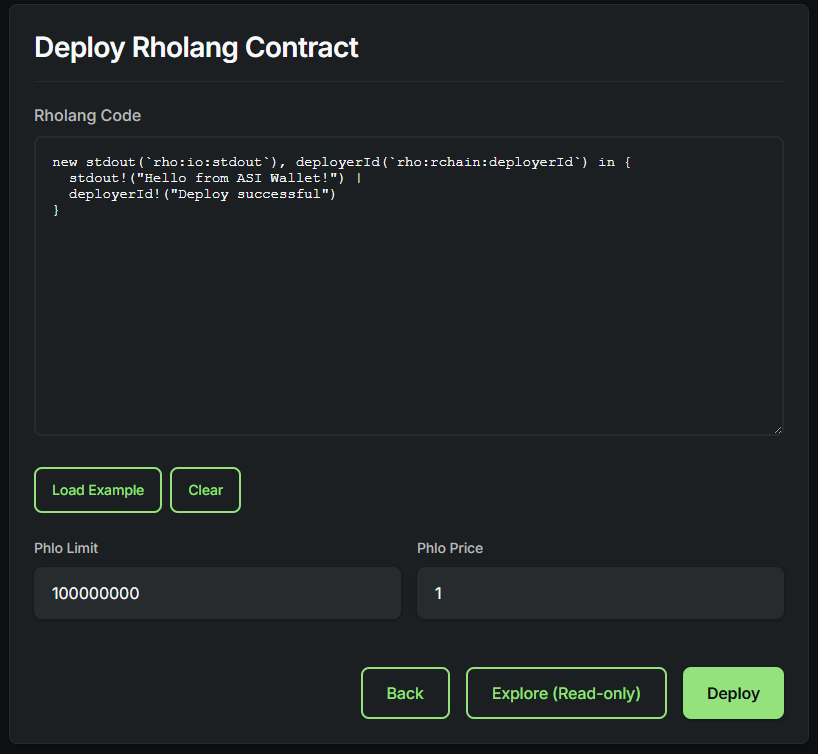
The Deploy page provides a simple interface for deploying Rholang contracts.
Deployment Process:
- Enter Rholang Code: Type or paste your contract, or click "Load Example" for a sample
- Configure Parameters: Set Phlo Limit (default: 100000000) and Phlo Price (default: 1)
- Deploy: Click "Deploy" to deploy to the network or "Explore (Read-only)" to test without deploying
Default Example Contract:
rholang
new stdout(`rho:io:stdout`), deployerId(`rho:rchain:deployerId`) in {
  stdout!("Hello from ASI Wallet!") |
  deployerId!("Deploy successful")
}
After clicking "Deploy", a confirmation dialog appears with deployment details.

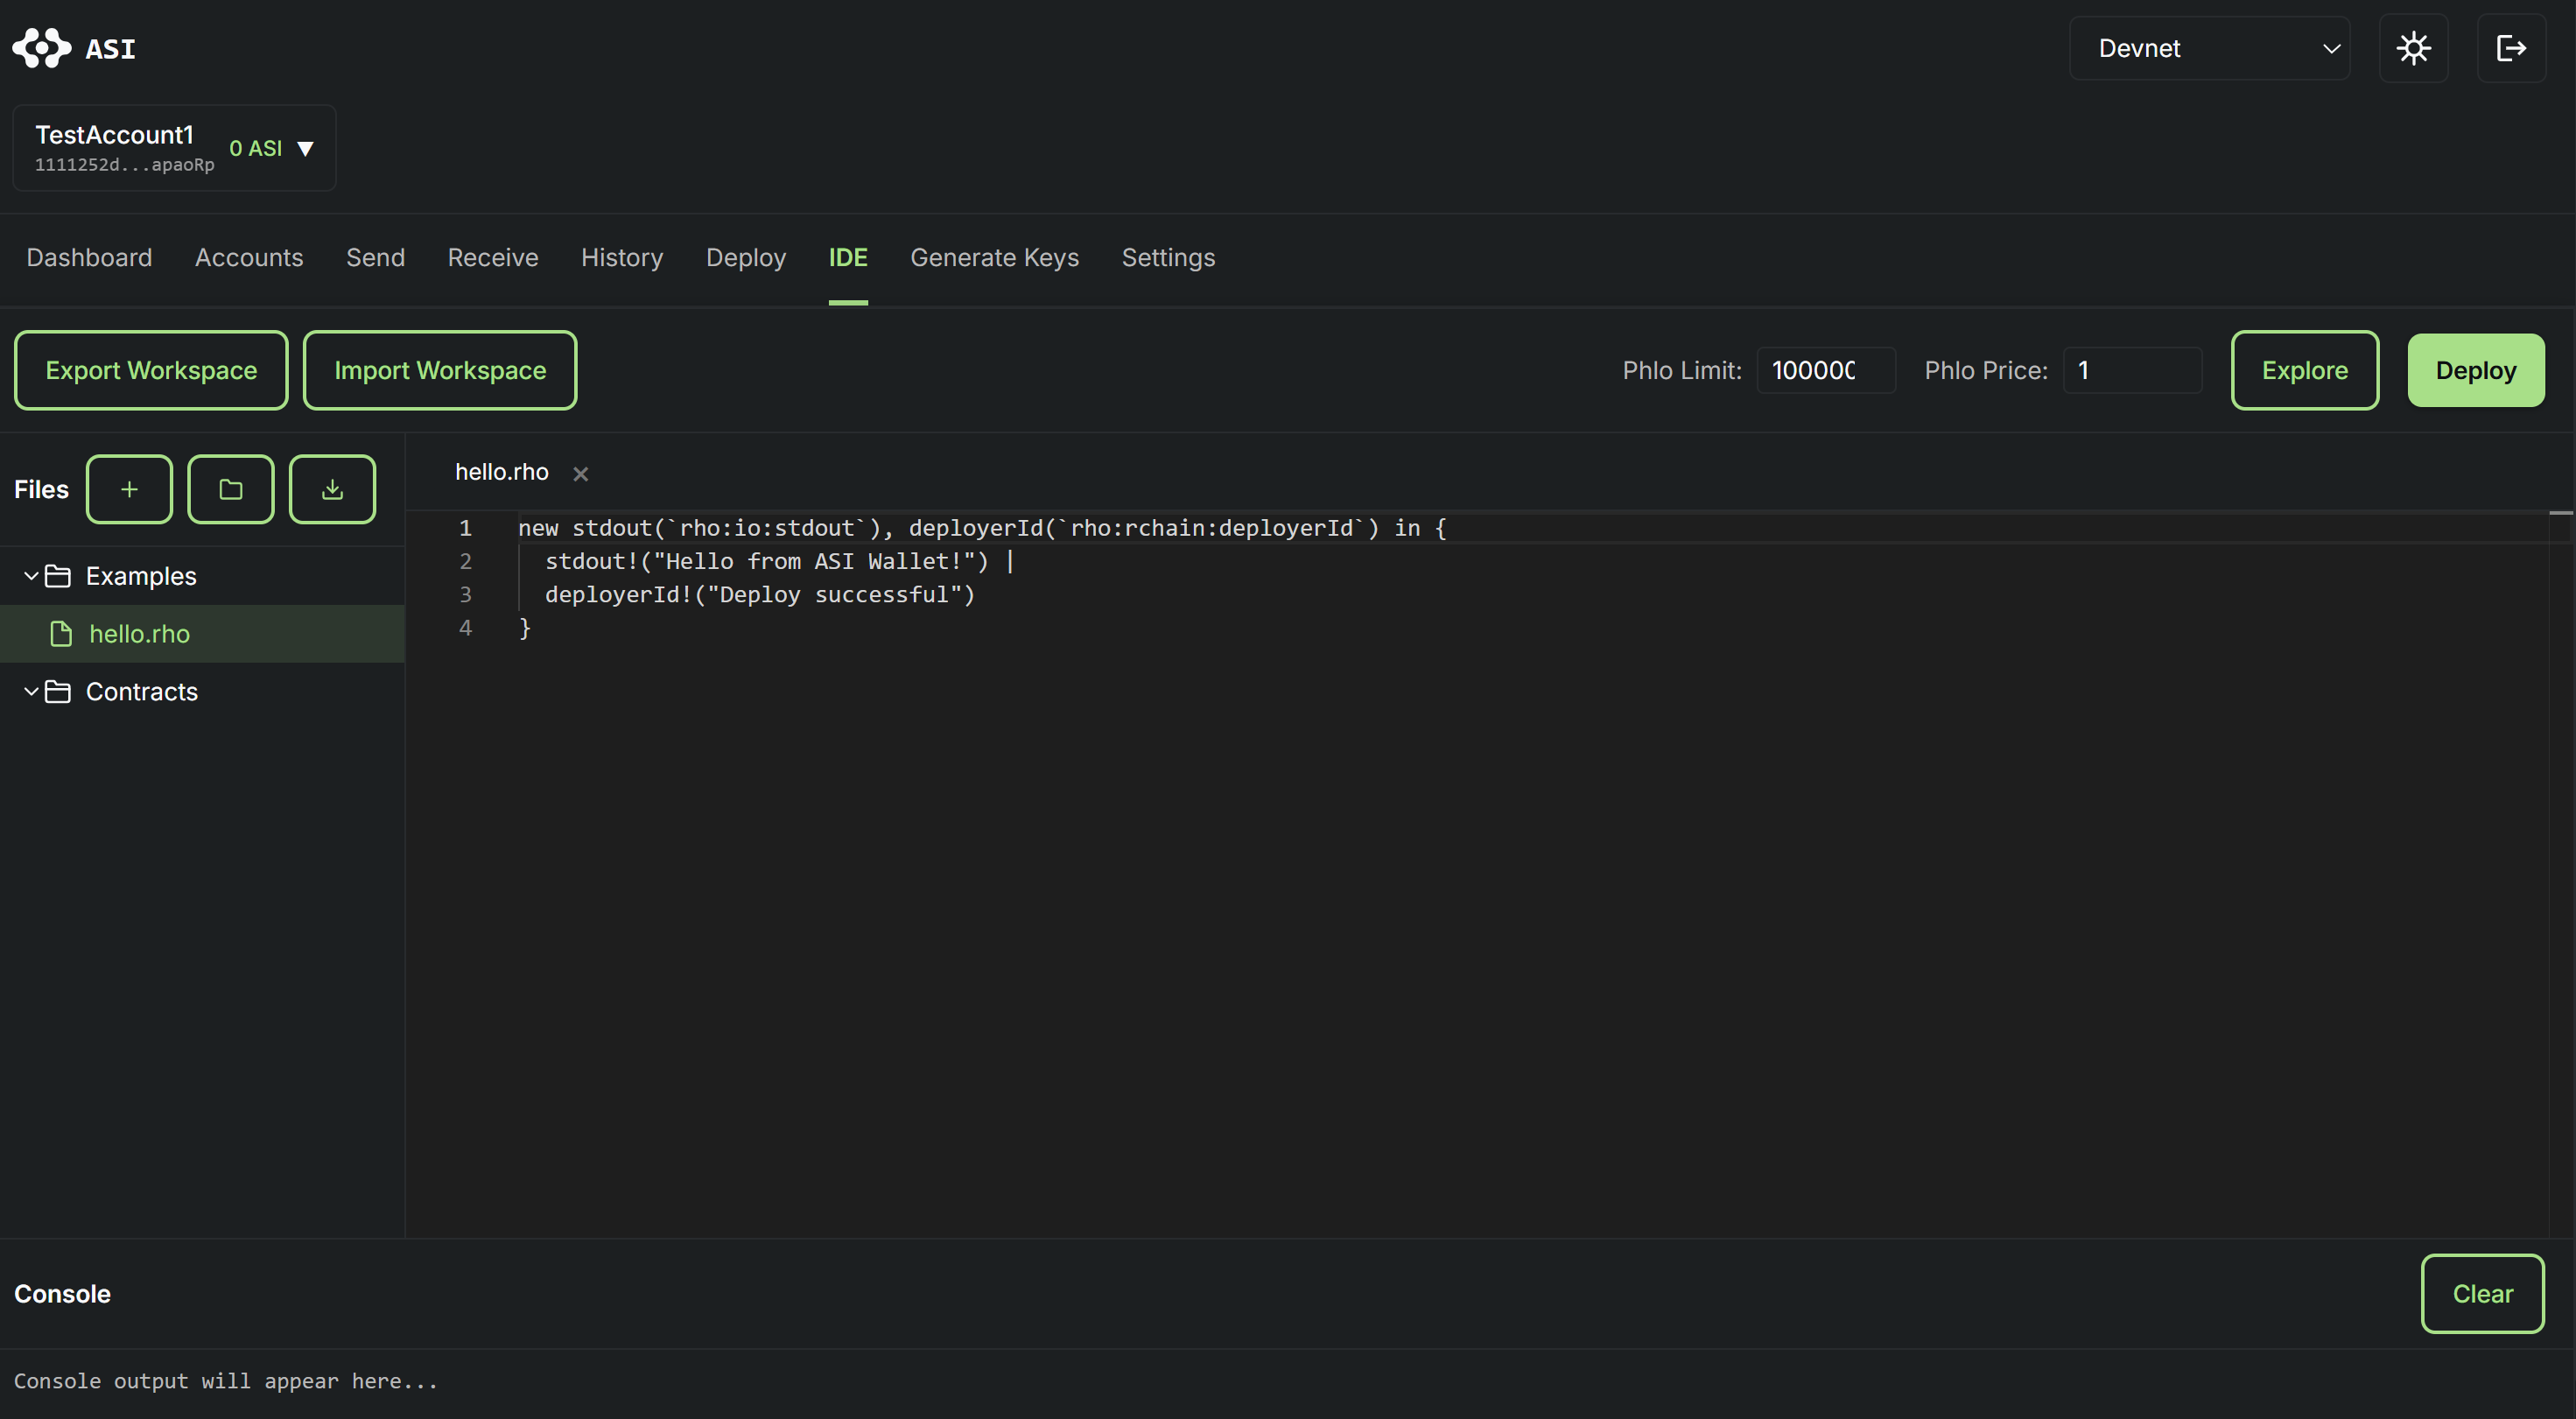
Integrated Development Environment
The IDE page provides a full-featured development environment with Monaco editor, file management, and console output.
Interface Layout:
- Left Sidebar: File tree and workspace management
- Center: Monaco code editor with Rholang syntax highlighting
- Bottom: Console output for deployment results
File Management:
- Create new files and folders
- Import
.rhofiles from your computer - Organize files in folders
- Export/Import entire workspace as JSON
Deployment Controls:
- Set Phlo Limit and Phlo Price
- Explore code in read-only mode
- Deploy to network with console feedback
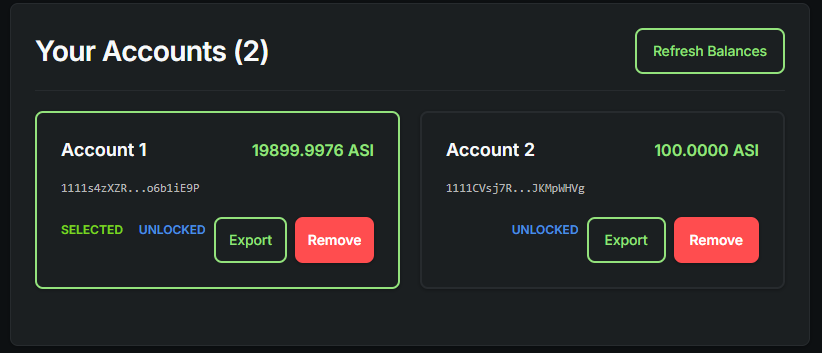
Account Management
The Accounts page displays all your accounts with balances and provides account management options.
Account Information: Each account card shows:
- Account name
- Shortened ASI address
- Current balance
- Status badges ("SELECTED", "UNLOCKED")
Account Actions:
- Refresh Balances: Update all account balances
- Export Account: Save encrypted account data
- Remove Account: Delete account (cannot be undone)
- Select Account: Click to make it active
Quick Account Switcher: Access the account switcher from the header to switch between accounts without re-authentication.
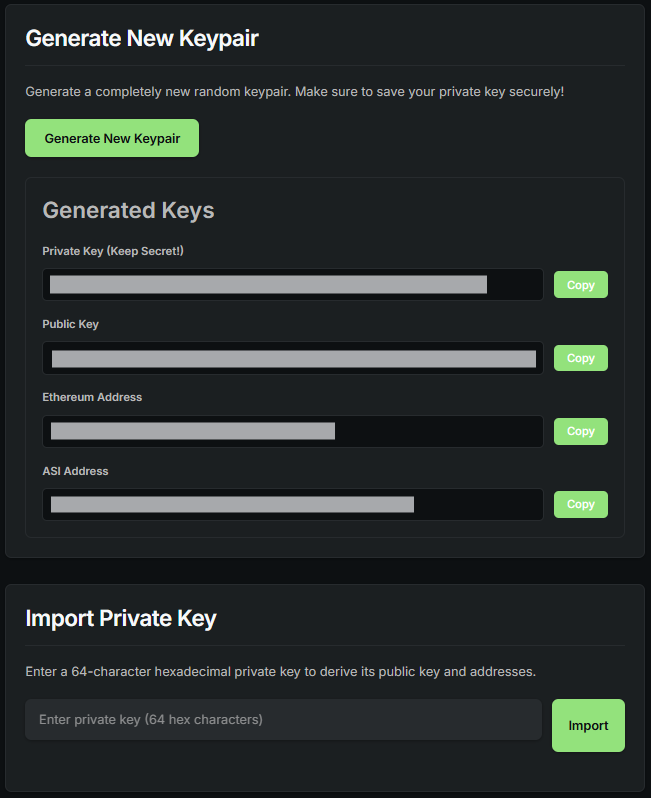
Generate Keys
The Generate Keys page provides cryptographic key generation for validator setup.
Generate New Keypair:
- Click "Generate New Keypair" button
- System creates a new random keypair
- Save all displayed credentials:
- Private Key (64 hex characters)
- Public Key (130+ hex characters with '04' prefix)
- Ethereum Address (with '0x' prefix)
- ASI Address (50-54 characters starting with '1111')
Import Private Key:
- Enter your 64-character hexadecimal private key
- Click "Import" button
- System derives and displays all keys
TIP
The ETH address is compatible with MetaMask and Ethereum wallets. The ASI Address is specific to the ASI Chain network.
Network Settings
The Settings page manages network configurations and private keys.
Devnet Configuration:
Devnet is the primary network for development and testing.
Validator Node:
- Host:
54.152.57.201 - gRPC Port:
40401 - HTTP Port:
40413
Observer Node:
- Host:
54.152.57.201 - gRPC Port:
40451 - HTTP Port:
40453
Local Network Configuration:
Local Network is for local development with your own node.
Configuration:
- Validator URL:
http://localhost:40413 - Observer URL:
http://localhost:40453 - Admin URL:
http://localhost:40405
Private Keys Management:
View and manage private keys for all accounts with password protection.
Support Resources
- Documentation: docs.asichain.io
- Block Explorer: explorer.dev.asichain.io
- Network Indexer: explorer.dev.asichain.io/indexer-status
- Faucet: faucet.dev.asichain.io
- GitHub: asi-alliance/asi-chain-wallet
Remember: With decentralized wallets, you have complete control and complete responsibility. There is no central authority to recover lost keys or reverse transactions. Always maintain secure backups and follow security best practices.